

.jpg)

Why should you sterilize glass jars before using them to store your preserves and jams? This is because sterilizing jars is essential to your product’s success and longevity. Sterilizing is an important part of food preservation to eliminate fungi, yeasts, or bacteria. This helps in protecting the food stored in the jar. Jars that are not properly cleaned will contaminate the food, causing it to spoil quickly.
Sterilization is a simple process so there is no reason to omit it in the canning process. In this article, we are going to show you how to clean and sterilize glass jars properly along with important reminders and tips when sterilizing. So keep on reading to know more!
Before embarking on any food preservation endeavor, such as crafting homemade jams, pickles, or canned goods, the meticulous sterilization of glass jars is a non-negotiable prerequisite. This critical step effectively eradicates dormant bacteria, yeasts, and molds that, if left unchecked, could compromise the integrity and safety of your preserved foods, ultimately leading to spoilage. Beyond the methods already outlined, a spectrum of proven and efficacious sterilization techniques exists, each offering distinct advantages depending on your available equipment and specific needs.
Things to Note Before Sterilizing Your Glass Jars
Here are important reminders you should take note of before you sterilize glass jars.
Do Not Boil Metal Lids and Their Rubber Rings
Never boil your jar’s metal lids and their rubber sealing rings. Always check the interior of the metal lids and see if they have a ring inside before sanitizing your jars. Although the rubber or plastic will not completely melt, the lid will no longer fit properly onto the jars.
The extreme boiling water’s heat can destroy the lid’s rubber ring which can result in a broken seal. This can lead to contamination of your jar’s contents. Simply submerge the lids and rings into simmering water for ten minutes to clean them thoroughly. You can also use the water you used for sanitizing the glass jars to clean the lids and rings once the water has slightly cooled. You can also check this guide on how to sterilize canning lids.

Make Sure That Your Sterilizing Area is Clean
Sterilizing glass jars is pointless if your working place is not clean. Even though you have cleaned your jars, they can easily be contaminated with bacteria from the surrounding areas. If you will be setting your glass jars on dish towels for drying, make sure that the dish towels are clean.
If possible, can your preserves immediately after sterilizing your glass jars. If the sterilized jars are left for an hour or more, you should sterilize them again before you can your products. And when you can, do not put hot products into cold jars or cold products into hot jars.

Inspect the Jars
Carefully check each jar for cracks, chips, or imperfections, especially around the rim, as these can prevent a proper seal. Examine lids for intact sealing compounds and ensure bands are free of rust or warping. Set aside damaged jars to avoid breakage or food safety issues during canning.
Use Oven Mitts
Sterilizing means subjecting your glass jars under high temperatures so you need to make sure that you handle your jars with care. Use oven mitts too to avoid burning yourself. If you’re going to be a wholesaler, you’d better use pick n place robots in your factory, because it could eliminate burning risk and save cost.

Cleaning Your Jar
Before sterilizing your glass jars, make sure to clean them first. You have two options for cleaning your jars: rice soaking and scrubbing.
Rice Soaking
- Take ¼ cup of raw and uncooked white rice and then put it inside each jar. We do not recommend using partially-cooked rice.
- Add 3 drops of dish soap into each jar.
- Fill ¾ of the jars with hot (not boiling) water.
- Close the jars and then shake them for 20-30 seconds.
- Drain the rice and then rinse the jars. It is recommended to rinse them 2 or 3 times to ensure that no grain will be left inside the jars.
- Discard the grains and air dry your jars.

Scrubbing
- Get your bottle brush. Use one with soft bristles to prevent the brush from scratching your glass jars’ inside. This also ensures that no areas will be left for microorganisms to grow.
- Wet your brush using hot water.
- Scrub each jar’s interior. Make sure that you brush all areas by pivoting your bottle brush’s handle.
- Rinse your jars by filling them with hot water. Swish the water around to make sure that all areas of your jar’s interior will be washed. Pour the water out and do another round of rinsing. Pay attention to any particles forming in the water.
- If the particles are not going away, add 2 drops of dish soap and 1 teaspoon of salt to the jar. Fill ⅓ of the jar with hot water. Cover it and then shake it for 20 seconds.
- Let the jars dry on a strainer. Make sure to store them upside-down.

How to Sterilize Your Glass Jars
Now, let us proceed to the five methods on how to sterilize glass jars.
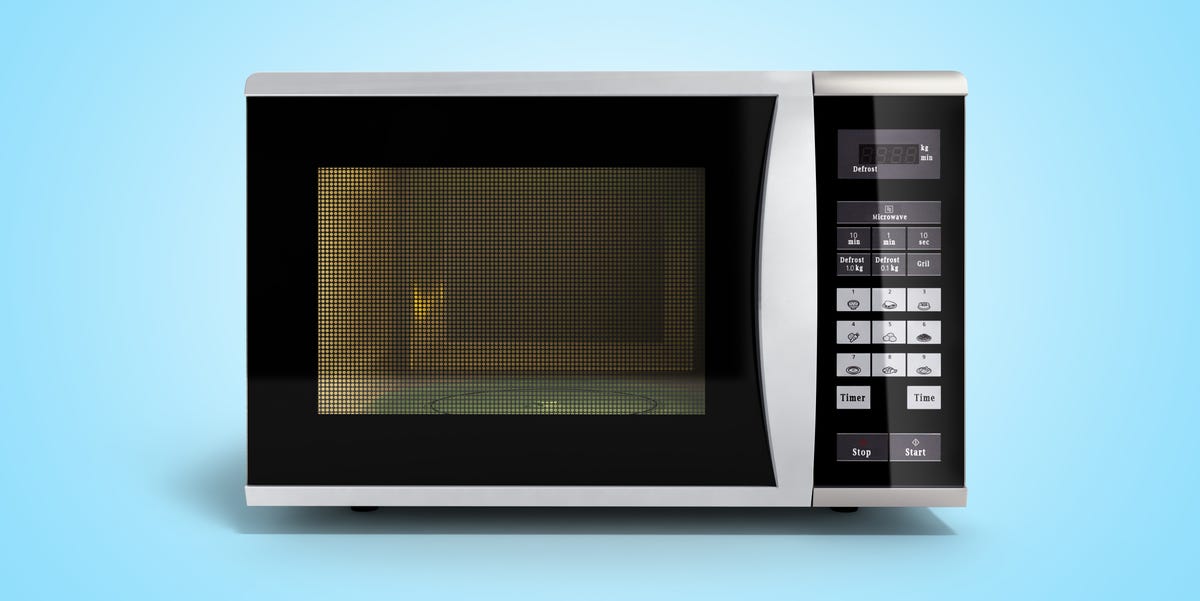
Using a Microwave
While offering a rapid sterilization solution, the microwave method is specifically suited for plain glass jars and is not recommended for jars featuring metal clamps, lids, or any metallic components (e.g., Kilner jars). The presence of metal in a microwave can lead to arcing and potential damage to both the microwave and the jars.
Preparation: After thoroughly washing your glass jars, leave a small amount of water inside each; do not completely dry them. The residual water is essential for creating steam during the microwaving process, which aids in sterilization.
Heating: Place the jars in the microwave and heat them for approximately 30 to 45 seconds. The precise duration may vary depending on the size of the jar and the wattage of your microwave. The goal is to generate sufficient steam to sterilize the interior of the jar.
Using a Dishwasher
This sterilization method is good if you own a steam dishwasher or if your machine has a setting for high temperature. You can use this method for Kilner-style glass jars and jars with screw tops, rubber rings, and clip tops.
- Fill the dishwasher with the cleaned jars.
- Run a rinse cycle and make sure that the ending time will match the time when your preserves, pickles, or jams are ready for canning.
- Once the rinse cycle is done, take one jar at a time and fill them with the hot preserve/jam.
The dishwasher sterilization method is obviously an easy one, but it uses up plenty of water. Plus, it is hard to time the cycle’s ending with the time when your product is ready for canning.

Using an Oven
This is the most reliable method to ensure that your jars are thoroughly clean before putting your preserves in them. It takes longer though compared to the other methods because the process takes about 30 minutes. The oven method also works well with jars that have rubber rings and clip tops.
The oven sterilization method is often favored for its ability to process multiple jars simultaneously and to ensure they remain dry and warm until ready for filling. Maintaining the jars at a warm temperature is crucial to prevent thermal shock—the sudden cracking of glass that can occur when hot food is introduced into cold jars.
- Heat your oven to 130°C or 275°F. Do not heat more than the recommended temperature or your glass jars might break.
- Lay 2 layers of newspaper on the oven’s shelves but not on its floor. For gas ovens, make sure that the newspapers are not near any flame.
- Place the still-damp jars upright or inverted on a clean baking sheet or oven-safe tray. Ensure there is adequate space between the jars to allow for proper heat circulation. Avoid placing them directly on the oven rack, as this can lead to uneven heating and potential breakage.
- Sterilize your jars for 20 minutes or more.
- Sterilizing Lids and Bands: The dry heat of an oven is not suitable for sterilizing metal lids and rubber sealing rings, as it can damage the sealing compound. These components should be sterilized separately by immersing them in simmering (not boiling) water for 5-10 minutes just before use.
- Use oven mitts to remove the jars from your oven. Put them on a heating pad or a heatproof mat.

Using a Stove
The fourth method is by using a stove if you do not have a microwave, dishwasher, or oven. Below is a short video showing how to sterilize glass jars using a stove:
The actual sterilization process using a stove will approximately take around 25 minutes.
- Get a large pot or a boiling water canner.
- Place the glass jars in the pot with their top parts facing upward.
- Cover your jars completely with hot water (not boiling). Make sure that the water level is one inch higher than the height of your jars in the pot.
- Wait for the water to boil.
- Start timing when the water boils. Remember the suggested timing based on your location’s altitude.
- After the boiling process is completed, turn off your stove. Leave the jars in the pot if you will not start the canning process yet.
- Use tongs or jar lifters to remove your jars from the pot.
- Drain the jars well and then let them dry.
Recommended Boiling Time Based on Altitude
The standard way of sterilizing glass jars is by submerging them in boiling water. But, your location’s altitude will affect the boiling temperature of the water. If you are in higher altitudes, the boiling point is lower so you need to make adjustments on the time your jars will spend in the boiling water.
Ten minutes is the recommended boiling time at sea level up to 1,000-feet elevation but you have to add 1 more minute in every additional 1,000 feet.
For instance:
- At 2,000 feet: Boil for 11 minutes.
- At 5,000 feet: Boil for 15 minutes.
- At 10,000 feet: Boil for 20 minutes.
This ensures that the jars are sterilized effectively, regardless of your location’s altitude.
Additional Considerations:
- Ensure jars are completely submerged with at least 1 inch of water above them.
- Always use a jar rack to prevent breakage during boiling.
- Avoid reusing jars with visible chips or cracks, as they may compromise the sterilization process.
This combination of timing adjustments and preparation ensures your jars are safely sterilized, preserving their contents effectively.
How to sterilize canning jars in the oven (Source: YouTube)
Using Vinegar
Distilled white vinegar can be more effective in killing bacteria compared to sanitizing solutions available commercially.
- Fill ⅓ of your glass jar with distilled white vinegar.
- Add hot water until the bottle is filled up to the top.
- Leave the jar for 10 minutes.
- Empty the jars and then rinse them until the odor of the vinegar dissipates which can take 2-3 full rinses using hot water.
- Let the jars dry.

Tips on Sterilizing Glass Jars
- Leave pickles, preserves, and jams for about 15 minutes before you seal them.
- Sterilize more glass jars than needed to avoid wasting your time from doing another sterilization process once your product is ready.
- Remove glass jars from your dishwasher or oven only when you need them or they are going to get cold.
- Do not use rusty or damaged jar lids because they will not produce a tight seal. You can use cellophane and wax discs instead.

Conclusion
Recycling glass jars is a great way of reducing the amount of waste we generate that destroys the environment. By recycling jars, not only are you helping save the earth but it also allows you to reduce your packaging expenses. And if you are looking for a reliable glass jar manufacturer, you can rely on Roetell. We supply a wide variety of food-grade glass containers for different applications.
If you’re looking for more Glass Jars Manufacturers, check out the following articles: